segunda-feira, 10 de abril de 2023

Atualização DELL INSPIRON 15R com Update para Windows 10 22H2 travado em 61% ou 99%

 Como atualizar notebook DELL INSPIRON 15R com Windows 10 que está com a atualização travada em 61% ou 99%:

Processo de atualização manual do Windows 10 para versão Windows 10 - 22H2


1) Remova o cache de atualizações do Windows 10

Aperte Win + R então digite services.msc e aperte ENTER.

Encontre "Windows Update" de duplo clique e na janela que abrir clique em PARAR


Entre e apague todos os arquivos da pasta C:\Windows\SoftwareDistribution\Download 

Passo 2) Digite WIN +R e digite devmgmt.msc

Selecione o Controlador de Som -> Conexant e clique em "Desinstalar dispositivo", não se preocupe que no próximo boot do windows o dispositivo é instalado automaticamente.


Passo 3) Baixe o "Assistente de atualização" do Windows 10 22H2 do site Oficial da Microsoft:

https://www.microsoft.com/pt-br/software-download/windows10


Clique em "Atualizar agora" será baixado o arquivo Windows10Upgrade9252.exe

Passo 4) Clique e abra o programa de atualização Windows10Upgrade9252.exe e aguarde a atualização. Seu notebook após concluir a instalação em 100% reiniciará várias vezes, e vai estar com o Update para Windows 10 22H2 aplicado.

Obs.: É altamente recomendado fazer um backup completo do sistema antes de executar o processo de atualização Manual para Windows 22H2, caso seja necessário reverter o processo de Upgrade. Para fazer backup completo da sua máquina siga o passo a passo do link COMO CRIAR E USAR IMAGEM DE SISTEMA WINDOWS 


terça-feira, 25 de maio de 2021

Apache FtpServer (Apache MINA) Exception with Passive Ports

The below error message in Apache FtpServer (Apache MINA) happens when you try to use Passive Ports below 1024, when the Ftp Client send the passive command "quote pasv" the FtpServer throws the Exception.

java.net.ConnectException: Connection timed out (Connection timed out)

    at java.base/java.net.PlainSocketImpl.socketConnect(Native Method)

    at java.base/java.net.AbstractPlainSocketImpl.doConnect(AbstractPlainSocketImpl.java:399)

    at java.base/java.net.AbstractPlainSocketImpl.connectToAddress(AbstractPlainSocketImpl.java:242)

    at java.base/java.net.AbstractPlainSocketImpl.connect(AbstractPlainSocketImpl.java:224)

    at java.base/java.net.SocksSocketImpl.connect(SocksSocketImpl.java:392)

    at java.base/java.net.Socket.connect(Socket.java:609)

    at java.base/java.net.Socket.connect(Socket.java:558)

    at org.apache.ftpserver.impl.IODataConnectionFactory.createDataSocket(IODataConnectionFactory.java:311)

    at org.apache.ftpserver.impl.IODataConnectionFactory.openConnection(IODataConnectionFactory.java:257)

    at org.apache.ftpserver.command.impl.NLST.execute(NLST.java:101)

    at org.apache.ftpserver.impl.DefaultFtpHandler.messageReceived(DefaultFtpHandler.java:211)

    at org.apache.ftpserver.listener.nio.FtpHandlerAdapter.messageReceived(FtpHandlerAdapter.java:62)

    at org.apache.mina.core.filterchain.DefaultIoFilterChain$TailFilter.messageReceived(DefaultIoFilterChain.java:858)

    at org.apache.mina.core.filterchain.DefaultIoFilterChain.callNextMessageReceived(DefaultIoFilterChain.java:542)

    at org.apache.mina.core.filterchain.DefaultIoFilterChain.access$1300(DefaultIoFilterChain.java:48)

    at org.apache.mina.core.filterchain.DefaultIoFilterChain$EntryImpl$1.messageReceived(DefaultIoFilterChain.java:947)

    at org.apache.ftpserver.listener.nio.FtpLoggingFilter.messageReceived(FtpLoggingFilter.java:85)

    at org.apache.mina.core.filterchain.DefaultIoFilterChain.callNextMessageReceived(DefaultIoFilterChain.java:542)

    at org.apache.mina.core.filterchain.DefaultIoFilterChain.access$1300(DefaultIoFilterChain.java:48)

    at org.apache.mina.core.filterchain.DefaultIoFilterChain$EntryImpl$1.messageReceived(DefaultIoFilterChain.java:947)

    at org.apache.mina.core.filterchain.IoFilterEvent.fire(IoFilterEvent.java:74)

    at org.apache.mina.filter.logging.MdcInjectionFilter.filter(MdcInjectionFilter.java:135)

    at org.apache.mina.filter.util.CommonEventFilter.messageReceived(CommonEventFilter.java:70)

    at org.apache.mina.core.filterchain.DefaultIoFilterChain.callNextMessageReceived(DefaultIoFilterChain.java:542)

    at org.apache.mina.core.filterchain.DefaultIoFilterChain.access$1300(DefaultIoFilterChain.java:48)

    at org.apache.mina.core.filterchain.DefaultIoFilterChain$EntryImpl$1.messageReceived(DefaultIoFilterChain.java:947)

    at org.apache.mina.filter.codec.ProtocolCodecFilter$ProtocolDecoderOutputImpl.flush(ProtocolCodecFilter.java:398)

    at org.apache.mina.filter.codec.ProtocolCodecFilter.messageReceived(ProtocolCodecFilter.java:234)

    at org.apache.mina.core.filterchain.DefaultIoFilterChain.callNextMessageReceived(DefaultIoFilterChain.java:542)

    at org.apache.mina.core.filterchain.DefaultIoFilterChain.access$1300(DefaultIoFilterChain.java:48)

    at org.apache.mina.core.filterchain.DefaultIoFilterChain$EntryImpl$1.messageReceived(DefaultIoFilterChain.java:947)

    at org.apache.mina.core.filterchain.IoFilterEvent.fire(IoFilterEvent.java:74)

    at org.apache.mina.core.session.IoEvent.run(IoEvent.java:63)

    at org.apache.mina.filter.executor.OrderedThreadPoolExecutor$Worker.runTask(OrderedThreadPoolExecutor.java:770)

    at org.apache.mina.filter.executor.OrderedThreadPoolExecutor$Worker.runTasks(OrderedThreadPoolExecutor.java:762)

    at org.apache.mina.filter.executor.OrderedThreadPoolExecutor$Worker.run(OrderedThreadPoolExecutor.java:704)

    at java.base/java.lang.Thread.run(Thread.java:834)


To solve this problem use Passive Ports ABOVE 1024, so using 10000-10100 solved my problem:

Sample working configuration:

<server xmlns="http://mina.apache.org/ftpserver/spring/v1"

    xmlns:xsi="http://www.w3.org/2001/XMLSchema-instance"

    xsi:schemaLocation="

       http://mina.apache.org/ftpserver/spring/v1 http://mina.apache.org/ftpserver/ftpserver-1.0.xsd"

       id="myServer">

    <listeners>

        <nio-listener name="default" port="21">

            <ssl>

                <keystore file="./res/ftpserver.jks" password="password" />

            </ssl>

        <data-connection idle-timeout="60">

            <passive ports="10000-10100" external-address="200.1.2.3"/>

        </data-connection>

        </nio-listener>

    </listeners>

    <file-user-manager file="./res/conf/users.properties" encrypt-passwords="false"/>

</server>

Replace the IP ADDRESS 200.1.2.3 by the Real External IP of your server.

And allow the ports in iptables:

iptables -I INPUT -p tcp -m tcp --dport 20 -j ACCEPT
iptables -I INPUT -p tcp -m tcp --dport 21 -j ACCEPT
iptables -I INPUT -p tcp  --match multiport --dports 10000:11000 -j ACCEPT


terça-feira, 23 de março de 2021

Mensagens de erros comuns do Java JSF

Segue lista de erros comuns ao iniciar um projeto em JAVA com JSF + PRIMEFACES com o TOMCAT 


  1. Factory 'javax.faces.lifecycle.ClientWindowFactory


Erro do Tomcat na Console:

com.jun.faces.config.ConfigurationException: Factory 'javax.faces.lifecycle.ClientWindowFactory' was not configured properly.


Solução:

Esse erro ocorre quando esquece de criar o "beans.xml".

Criar o "/src/main/webapp/WEB-INF/beans.xml"


<?xml version="1.0" encoding="UTF-8"?>

<beans xmlns="http://xmlns.jcp.org/xml/ns/javaee"

    xmlns:xsi="http://www.w3.org/2001/XMLSchema-instance"

    xsi:schemaLocation="http://xmlns.jcp.org/xml/ns/javaee 

    http://xmlns.jcp.org/xml/ns/javaee/beans_2_0.xsd"

    version="2.0" bean-discovery-mode="annotated">

</beans>


  1. java.lang.ClassNotFoundException: javax.faces.webapp.FacesServlet


No Log:

GRAVE: Servlet [Faces Servlet] in web application [/com.example] threw load() exception

java.lang.ClassNotFoundException: javax.faces.webapp.FacesServlet


Solução: 

Após clicar em "Maven -> Update" esse erro pode ocorrer, porque o projeto não consegue mais encontrar as bibliotecas baixadas pelo Maven.

Adicionar as bibliotecas do Maven do Path:

Clique direito no projeto -> Properties -> Deployment Assembly -> Add -> Java Build Path Entries -> Maven Dependencies.


Isso ocorre no Updade do Maven porque o pom.xml deve especificar a versão 1.8 do java, sem essa configuração durante o "Maven Update" ele volta sozinho para versão 1.5 nas configurações.


<!-- Parâmetros de execução -->

<build>

<!-- Nome do arquivo empacotado (.war) que você vai entregar para o cliente -->

<finalName>CursoJSF</finalName>

<plugins>

<!-- Compilador do Maven na versão 3.3 -->

<plugin>

<groupId>org.apache.maven.plugins</groupId>

<artifactId>maven-compiler-plugin</artifactId>

<version>3.8.1</version>

      <!-- Compilador do Java na versão 8 -->

<configuration>

<source>1.8</source>

<target>1.8</target>

</configuration>

</plugin>

</plugins>

</build>


Verificar aba "Problems" do Eclipse:

Mensagens do tipo "Cannot change version of project facet Dynamic Web Module to x.x" é causado porque o Eclipse muda a versão do web-app automaticamnete no web.xml após um "Maven Update".

Verifique se a versão do web-app está em 4_0, senão corrija no "web.xml"


<?xml version="1.0" encoding="UTF-8"?>

<web-app xmlns:xsi="http://www.w3.org/2001/XMLSchema-instance"

xmlns="http://xmlns.jcp.org/xml/ns/javaee"

xsi:schemaLocation="http://xmlns.jcp.org/xml/ns/javaee http://xmlns.jcp.org/xml/ns/javaee/web-app_4_0.xsd"

id="WebApp_ID" version="4.0">


TOMCAT NÃO INICIA - ERRO  WELD-000075

APARECE NO LOG:

Caused by: org.jboss.weld.exceptions.DefinitionException: WELD-000075: Normal scoped managed bean implementation class has a public field:  [EnhancedAnnotatedFieldImpl] public projetoweb.ComandoExterno.saidaDoComando


Explicação:

Erro: 

The motivation of WELD-000075 is technical. Access to a public field cannot be proxied. So a bean is required to be either pseudo scoped (@dependent, @singleton) or to guarantee access through public methods (which shouldn't be hard to achieve).


Resumindo:

EXISTE UM ATRIBUTO PÚBLICO NO BEAN QUE CAUSA UM ERRO NO CDI.


ERRADO:

public class ComandoExterno {

public String saidaDoComando;


Solução:

TODOS OS ATRIBUTOS DO BEAN DEVEM SER PRIVATE COM ACESSO ATRAVÉS DE GET SET!!!


CERTO:


public class ComandoExterno {

           private String saidaDoComando;


ERRO WELD-000072 - Bean declaring a passivating scope must be passivation capable.


O Bean quando é @SessionScoped ou @ViewScoped é OBRIGATÓRIO implementar Serializable!!!


Solução: SEMPRE IMPLEMENTAR SERIALIZABLE EM TODOS OS BEANS!!!


@Named

@SessionScoped

public class BotaoTeste implements Serializable{

...


segunda-feira, 15 de março de 2021

Jshell problem with PageUp and PageDown not working on Linux Ubuntu/CentOS

A very common problem in Java Shell Tool (jshell) are the Page-Up and Page-down keyboard keys that do not work properly when accessing through SSH terminal.

When you press page-up key, the terminal show "[1~" characters and when you press page-down key, the terminal show "[4~" characters. 

 This problem happended to me in Linux Ubuntu and Centos distributions, and I believe that it must occur with almost all other distributions. 

TROUBLESHOOTING

1) Temporary solution: 
Change TERM variable to "linux" before start jshell.

$ TERM=linux

$ jshell 
|  Welcome to JShell -- Version 11.0.10
|  For an introduction type: /help intro
jshell>   // Now PgUp and PgDown works. 


2) Permanent solution:
Change TERM variable at terminal startup in ~/.bashrc


$ echo "e
xport TERM=linux"  >> ~/.bashrc


Now close your SSH connection, and connect again. 
Show TERM envirounment variable must be "linux"

$ echo $TERM

linux

Start jshell:

 $ jshell 

|  Welcome to JShell -- Version 11.0.10
|  For an introduction type: /help intro
jshell>   // Now PgUp and PgDown works. 


3) Alternative solution:
Use terminal multiplexers like screen or tmux:

$ screen
$ jshell 

|  Welcome to JShell -- Version 11.0.10
|  For an introduction type: /help intro
jshell>   // Now PgUp and PgDown works. 


quarta-feira, 9 de setembro de 2020

Java application for converting 264 files produced by some Chinese IP cameras


chipcaco-java

Commandline Java tool for converting .264 files produced by some Chinese IP cameras

chipcaco-java (Chinese IP Camera Converter) is a Java application for converting .264 files produced by some Chinese IP cameras like TPTEK, IeGeek, and other brands that uses CamHi software.

The H.264 recordings downloaded from the camera can't be played or converted by common applications like VLC.

This software remove the proprietary extensions from the video so can be played on any video player.

This is a JAVA port of the C application by Ralph Spitzner, and also based on the node-JS port by Sven Jacobs

If you are looking for a video player and  Converter for Windows/Mac with Graphical Interface for Chinese Cameras recordings I recomend to try HIP2P Client (from IPCAM XIN). Chipcaco-java is better used when command-line tool is needed, and works on any Operational System with Java Virtual Machine 8 or newest.

Installation

Download JAR file chipcaco.jar: chipcaco.jar

Source Code: https://github.com/rodrigoeggea/chipcaco-java

Usage

java -jar chipcaco.jar <source file> 

where <src> is the source file produced by the camera. The output file has same name but with .h264 extension.

Note: The produced file must likely be additionally processed by ffmpeg or similar applications before it can be played. Example:

Only copy H264 frames and fix FPS (can be played only in VLC)

ffmpeg -framerate 25 -i intermediate.h264 -c copy video.h264

Converting to MP4 and fix FPS (can be player in any Video Player or Browser)

ffmpeg -framerate 25 -i intermediate.264 video.mp4  

sábado, 5 de setembro de 2020

JavaInterface jipopt.dll compiled in 64-bits for Windows with HS71 example


JavaInterface jipopt.dll compiled in 64-bits for Windows with HS71 example


Ipopt is a solver for large scale nonlinear optimization problems (NLP) with non-linear contraints. The Java Native Interface (JNI) is a programming framework that allows Java code running in the Java Virtual Machine (JVM) to call and be called by native applications and libraries written in languages such as C and C++. JIpopt requires Java 5 or higher.

The Official Jipopt website provides pre-compiled DLL's with Ipopt+MUMPS for Win32 platforms and for Ubuntu Linux i386.

Due to the lack of this jipopt library compiled for Java Runtime 64-bits, I compiled and providing in this repository with the original sample code HS71 together with the 64-bit compiled jipopt.dll.

This jipopt library was compiled by the source Ipopt-3.12.13 in Windows10 using MSYS2-64bits and following the instructions Installing Ipopt with some workarounds.

Prerequisites

Java JDK 64-bits for Windows - Java SE Development Kit

Eclipse IDE - Eclipse IDE

Installing

  1. Clone this GIT Project to Eclipse

  2. Add the folder "jni_dependency" to Windows PATH variable (See README.TXT)

  3. Restart Eclipse

  4. Run the java example "HS01.java"

Authors

domingo, 19 de abril de 2020

Instalando Python3 + Selenium + PhantomJS no UBUNTU


INSTALAÇÃO


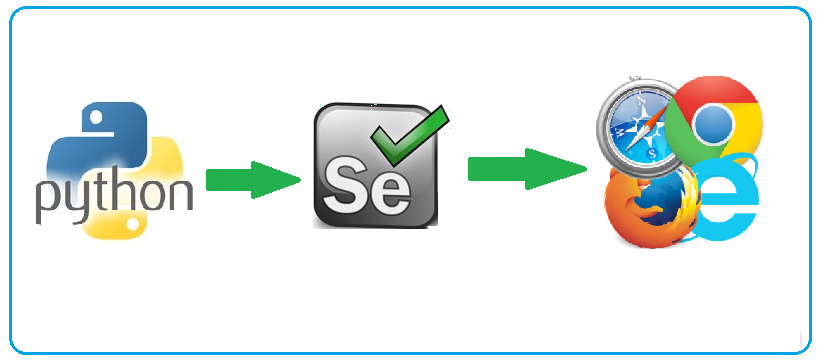
O Selenium é um conjunto de ferramentas que permite realizar testes automatizados ou buscar dados em páginas web ou realizar webcrawler (realizar buscas automatizadas em websites).
O Selenium precisa se comunicar com um Navegador que ele vai controlar e realizar todos os comandos solicitados, como procurar um botão na página e clicar nele. 
Ele consegue se comunicar com praticamente todos os navegadores (Firefox, Chrome, IE, Safari, Opera, PhamtomJS, etc...)
Neste tutorial vou ensinar a utilizar o PhantomJS, pois é um browser headless (sem necessidade de interface gráfica), ou seja pode ser utilizado em servidores.

1) Instalação dos pacotes necessários:


--------------------------------------------------------    
# apt-get install nodejs npm python3 python3-pip python3-selenium 
--------------------------------------------------------

Obs.: NÃO instale o PhantomJS do repositório via apt-get, a versão que está no repositório do Ubuntu/Debian é compilado com interface gráfica, e não é compatível com a biblioteca do Selenium para Python. Caso tenha instalado, desinstale com #apt-get purge PhamtomJS e siga passo 2.

2) Baixe o PhamtomJS do site oficial https://phantomjs.org, a versão correspondente ao seu servidor (32 ou 64 bits):

--------------------------------------------------------

cd /usr/src
# wget https://bitbucket.org/ariya/phantomjs/downloads/phantomjs-2.1.1-linux-x86_64.tar.bz2
# tar -jzvf phantomjs-2.1.1-linux-x86_64.tar.bz2
---------------------------------------------------------

Adicione no PATH temporariamente para teste: 


------------------------------------------------------------
# PATH=$PATH: /usr/src/phantomjs-2.1.1-linux-x86_64/bin
------------------------------------------------------------

Adicione no PATH permanentemente também: 

------------------------------------------------------------
echo "export PATH=$PATH:/usr/src/phantomjs-2.1.1-linux-x86_64/bin/" >> ~/.bashrc
------------------------------------------------------------

Verifique se o PhantomJS está executando corretamente:

------------------------------------------------------------
# phantomjs --version
2.1.1
------------------------------------------------------------

CRIE UM SCRIPT SIMPLES EM PYTHON3 COM SELENIUM PARA TESTE:

testeselenium.py ----------------------------------------------------------
#!/usr/bin/env python3
from selenium import webdriver
from selenium.webdriver.common.by import By
from selenium.webdriver.support.ui import WebDriverWait
from selenium.webdriver.support import expected_conditions as EC

driver = webdriver.PhantomJS()
driver.get("http://www.google.com")
input_element = driver.find_element_by_name("q")
input_element.send_keys("python")
input_element.submit()
html_source=driver.page_source
print(html_source)
----------------------------------------------------------
Neste exemplo, o Selenium utiliza o browser PhantomJS, abre a página do Google, procura pelo campo de pesquisa (find_element_by_name("q")) digita "python" e manda pesquisar.


Executo o código:

# ./testeselenium.py  

Vai retornar todo o código HTML com a resposta da pesquisa. Para poder visualizar melhor utilize o Lynx para remover as tags.

# ./testeselenium.py | lynx --dump -stdin | more 

DICAS


  • A melhor forma para encontrar o nome dos campos, utilize o browser Firefox ou Chrome no "Modo desenvolvedor", basta abrir a página, clicar com o botão direito e escolher "Inspecionar", ao lado direito vai abrir o DevTools, onde é possível navegar pelo código fonte e elementos da página.

  • Nunca utilize o nome selenium.py para o seu script, pois ele conflita com a biblioteca do Selenium.


Referências:

Realizando pesquisa nos elementos:


Examples, benchmark, video.
https://realpython.com/headless-selenium-testing-with-python-and-phantomjs/

Unit Test:
https://medium.com/@yareda/automating-tests-with-python-selenium-and-phantomjs-db37726b381


Atualização DELL INSPIRON 15R com Update para Windows 10 22H2 travado em 61% ou 99%

 Como atualizar notebook DELL INSPIRON 15R com Windows 10 que está com a atualização travada em 61% ou 99%: Processo de atualização manual d...